
DIY Wedding Suite - Striped Patterned Background
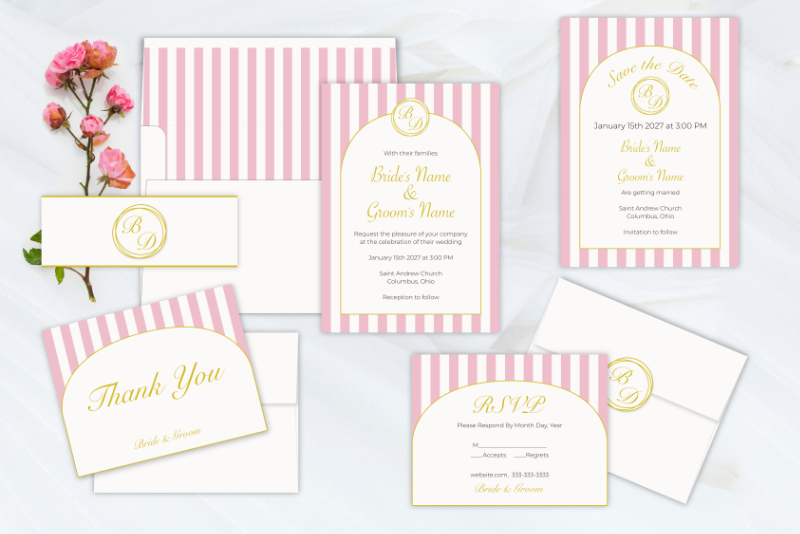
In this Affinity® Designer tutorial, we will create a simple striped repeat pattern, which will be one option for the background design for our wedding invitation suite. As with most digital patterns, we will make ours 12 x 12 inches at 300 dpi. So, this tutorial is good for those interested in creating patterns for other projects too.
This repeat pattern will be the background for each of the cards in the wedding invitation suite. This creates a continuity throughout the suite.
Affinity Designer screenshots used by permission of Serif (Europe) Ltd. This article is not endorsed by Serif Ltd.
This repeat pattern will be the background for each of the cards in the wedding invitation suite. This creates a continuity throughout the suite.
- Start a new document that is 12 x 12 inches at 300 dpi.
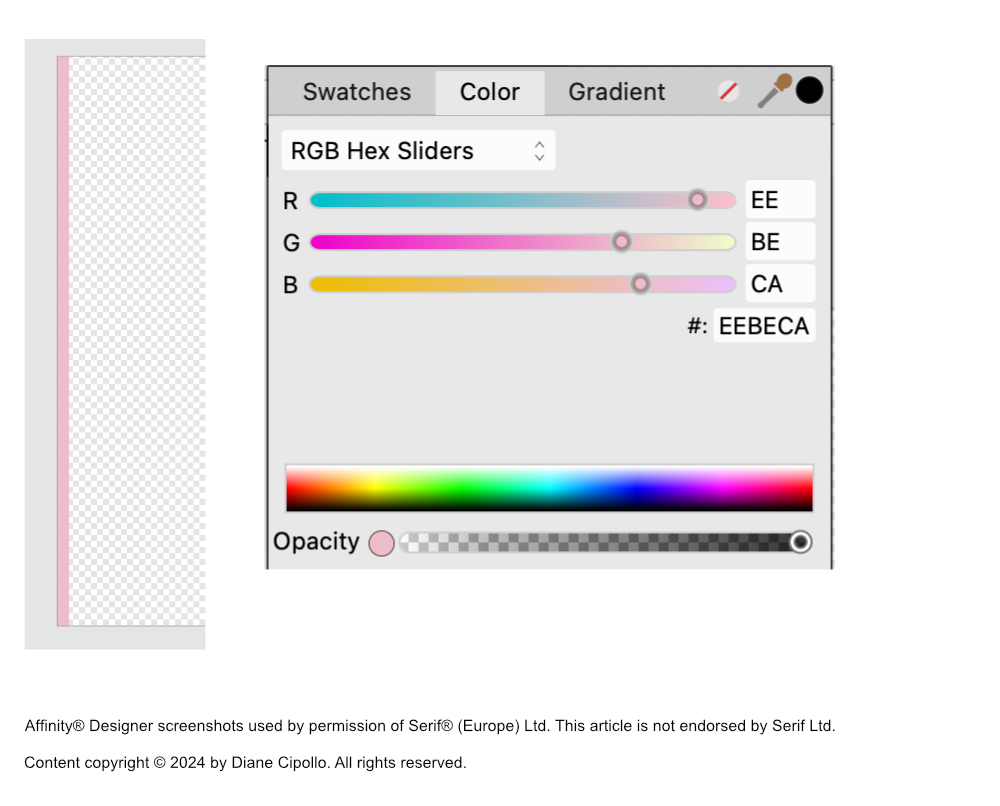
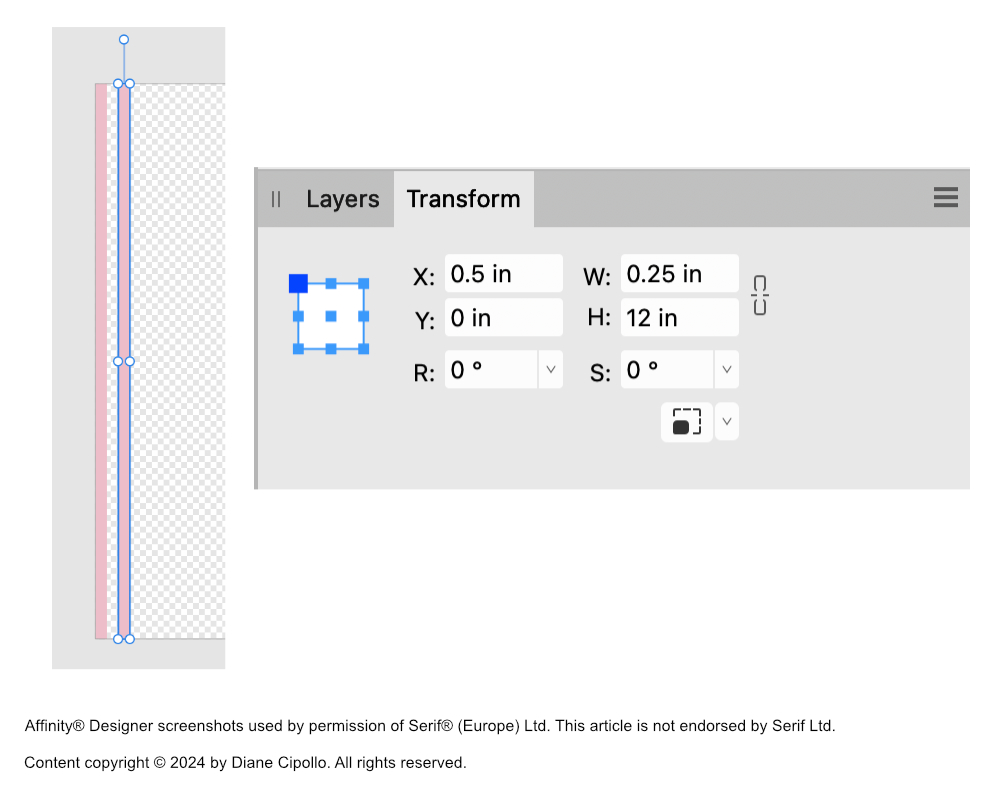
- With the Rectangle tool, draw a rectangle on the canvas that is .25 inches wide by 12 inches tall (see screenshot).
- In the Context toolbar, set the Fill to #EEBECA and the Stroke to null.
- Duplicate the rectangle and drag the second rectangle to the right. In the Transform panel, set the X value to .5 and the Y value to zero (see screenshot).
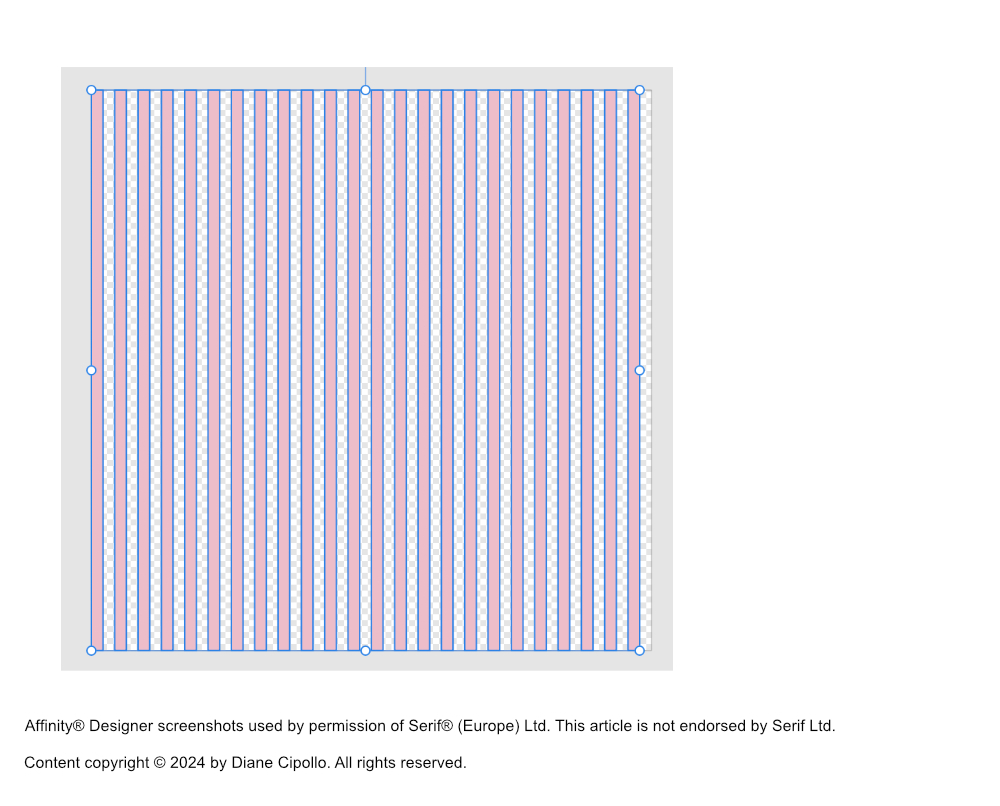
- From the top Menubar, click Edit - Duplicate to add another rectangle to the right. Continue this until the canvas is full (see screenshot).
- With the Rectangle tool, draw a rectangle over the entire canvas.
- Set the Fill to #FBFAFB and the Stroke to null.
- In the Layers panel, drag this layer to the bottom of the panel.
- Select all of the layers in the Layers panel. Right-click and choose Group. Name this group layer Striped Wedding Background (see screenshot).
- From the Menubar, click File - Save As and save your document with the same name as the group layer, which is StripedBackground (remove space). Save the file in the same location as the Art Deco background.
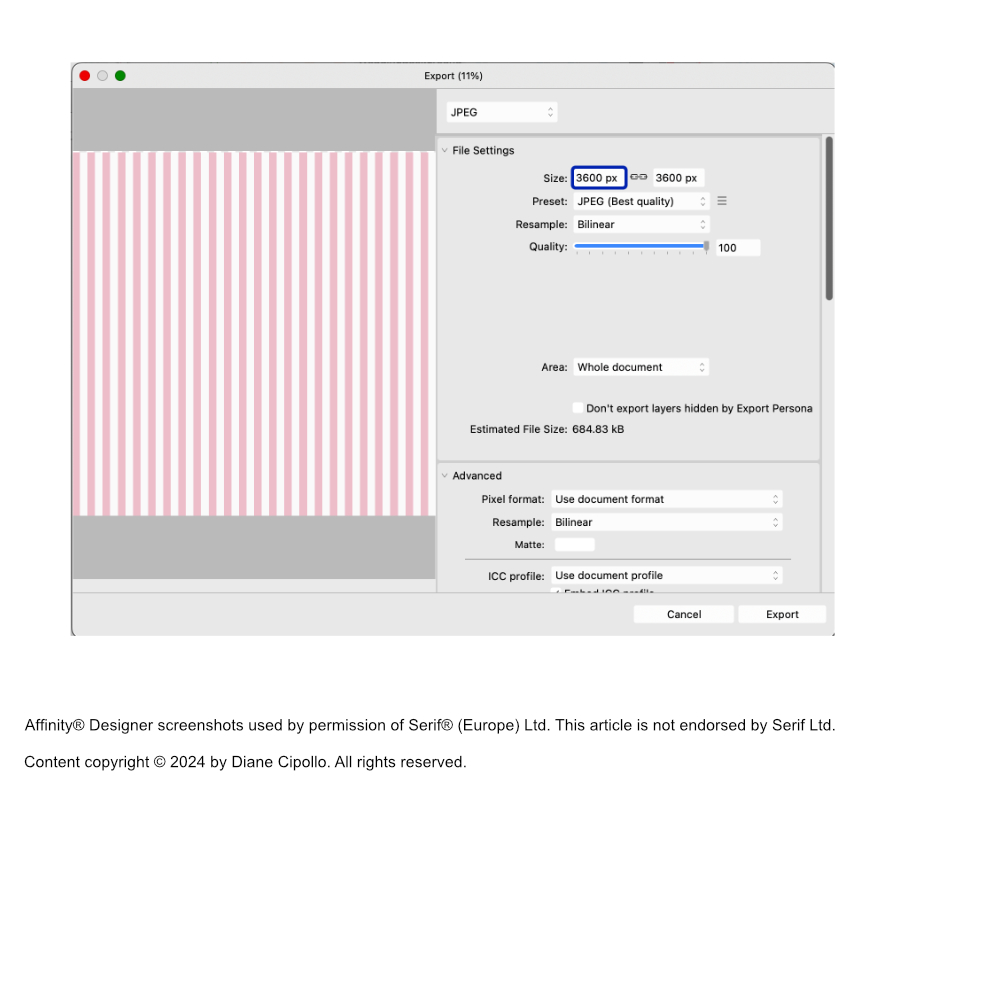
- Now, from the Menubar, click File - Export. Export the document as a .jpeg file, with the Quality set to 100 (see screenshot).
Now that we have our repeat pattern, let's add a lighter colored background.
Now we will save this document in both the Affinity Designer .afdesign format and in the .jpeg format.
Affinity Designer screenshots used by permission of Serif (Europe) Ltd. This article is not endorsed by Serif Ltd.

Related Articles
Editor's Picks Articles
Top Ten Articles
Previous Features
Site Map
Content copyright © 2023 by Diane Cipollo. All rights reserved.
This content was written by Diane Cipollo. If you wish to use this content in any manner, you need written permission. Contact Diane Cipollo for details.


